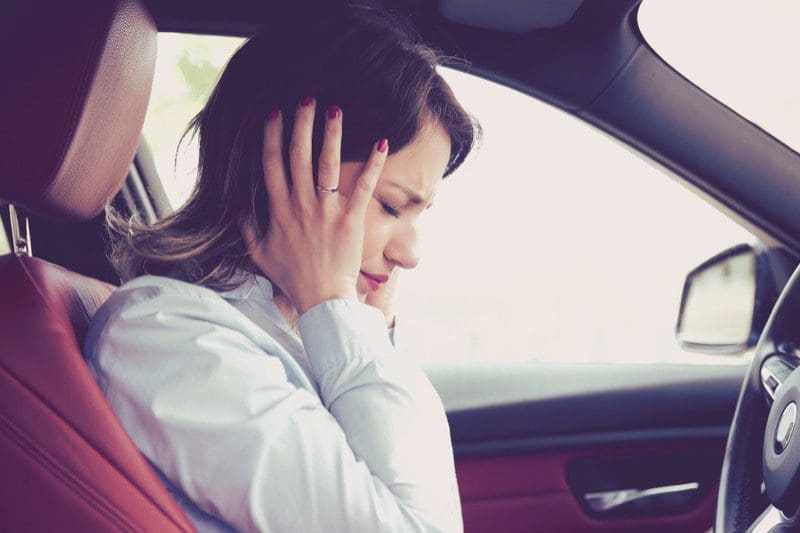
 One product that most car audio retailers offer that can benefit anyone with a car, truck or SUV is sound deadener. If your vehicle is noisy inside, gets hot quickly or people have trouble hearing you during hands-free phone calls, applying sound deadening can help dramatically. In this article, we’ll explain how sound deadening works and talk about the key benefits of adding damping material to your car, truck or SUV.
What is Sound Deadener?
If you have ever had the opportunity to look under the carpet or trim panels inside your car or truck, you may have seen patches of rubber or strips of butyl adhered to the body panels. The addition of this material by the automobile manufacturer adds mass to the metal panel. This added mass makes it harder for noise outside the vehicle to vibrate the panel and transfer noise to the interior of the vehicle.
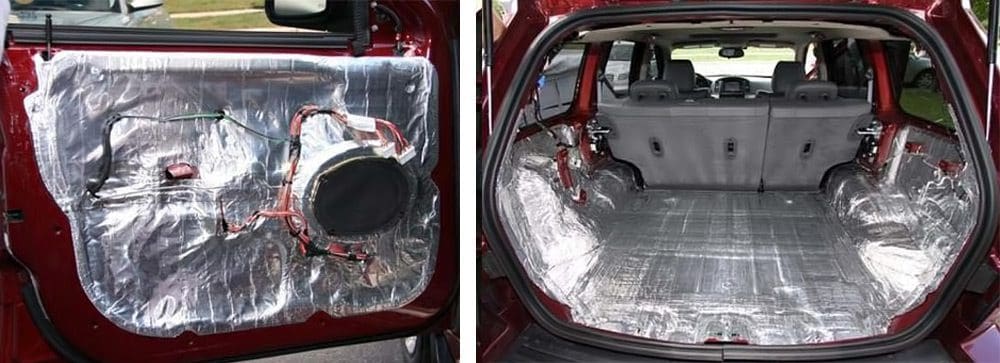
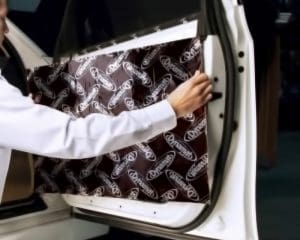 Aftermarket sound deadening products work the same way. Most sound deadening is sold in sheets or rolls. The material is very dense and has one surface that includes a strong adhesive. Your installer can apply the material to flat metal surfaces like the doors, floor, roof, firewall, rear fenders and trunk of your vehicle.
Many damping materials like Dynamat Xtreme, Stinger RoadKill Expert, Wirez Premium Sound Deadening and Hushmat Ultra include a layer of aluminum on top of the flexible base layer. This aluminum adds strength to the damping material and allows it to span openings in door panels.
Some damping materials include a layer of closed-cell foam on top of the aluminum layer. Focal BAM and SoundSkins Pro are two common examples of damping materials with foam. Wirez, Dynamat and several other companies offer foam on its own as another option. This foam layer helps to reduce vibrations and rattles from objects touching the damping material. Under floors, it can prevent wire harnesses and cabling from buzzing. In doors, it prevents the rods that activate the door release mechanism and locks from rattling.
Another option for sound deadening is a spray-on solution. Cascade Audio Quiet Kote, Boom Mat Spray-On and bedliners like Line-X are a great way to add mass to flat metal surfaces.
Sound Damping Materials Make Your Vehicle Quieter
Several years ago, we took part in a test of the noise reduction capabilities of sound deadening material. The vehicle in question was a 2007 Jeep Grand Cherokee SRT with the 6.1-liter Hemi. The test started with three baseline measurements of the noise inside the vehicle. We took SPL measurements with the vehicle at idle and cruising at 40 miles per hour and 60 miles per hour. Happy with the measurements, we applied a layer of aluminum-backed damping material to the inner and outer door skins of the truck and repeated the measurements. Impressed by our findings, the last step was to treat the cargo area of the Jeep and repeat the tests once again. As you can see from the chart below, the results are impressive.
Condition Idle Cruise a 40mph Cruise at 60mph
No Deadening 88.5dB 99.0 dB 103dB
Doors 87.9dB 98.1dB 101.4dB
Doors and Cargo Area 84.7dB 94.3dB 98.7dB
Total Noise Reduction -3.8dB -4.7dB -4.3dB
Had we chosen a vehicle that came from the factory without a moderate amount of sound damping, the results would have been even more impressive.
How a Quieter Interior Improves Your Sound System
If you look at any of the sound deadening manufacturers’ websites, it will quickly become apparent that they all claim that adding sound deadening will improve the performance of your sound system. This is absolutely true and it helps in two unique and different ways.
 First, by simply reducing the background noise in your car or truck, you improve the effective signal-to-noise ratio of your stereo. What does this mean? Having less background noise makes it easier for you to hear the quiet parts of your music. Imagine if you were listening to a track at a volume level of 100dB. If you have background noise level of 95 dB, any portion of the song that is around the 95dB level will have to battle with the background noise to be heard. If you can reduce the noise level in your car to 90 dB, you can hear more of your music.
The second and perhaps the most significant benefit of sound deadening is to improve the effectiveness of the speakers in your vehicle. In most cases, the doors of your car, truck or SUV have a hole in the inner skin for the speaker, and access holes for the window regulator, door handle and locking mechanism. A speaker produces an equal amount of sound from the front of its cone as from the back. If these two sound sources mix, they cancel each other out. This cancellation happens most often in lower frequencies, say below 300 Hz.
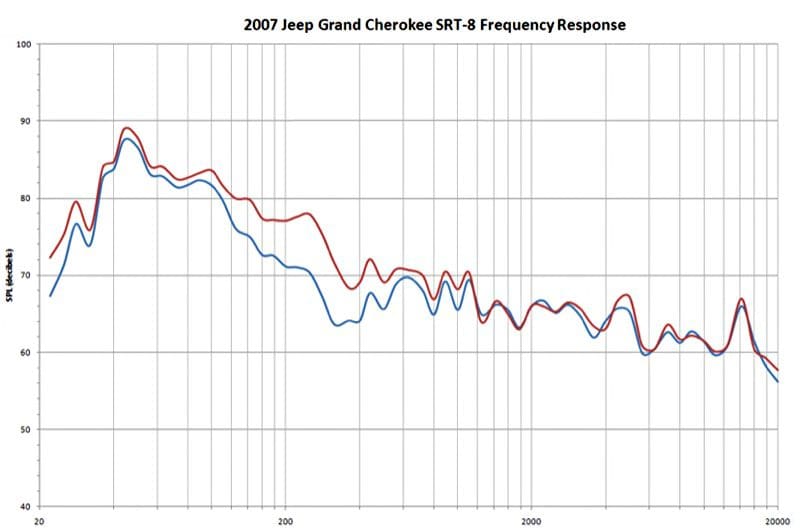
If you were to compare the in-car frequency response of a speaker mounted in the factory door location to that of a vehicle where a layer of sound deadening has been applied to the inner surface of the door, you would see a dramatic increase in bass output.
The graph below shows this very test in that 2007 Jeep Grand Cherokee. The effective output from the factory-installed 6×9 woofer increased by a jaw-dropping 8dB at 240Hz. The gains were visible for all frequencies below about 400Hz, which was, in this application, likely the upper crossover frequency of the speaker.
Another cool new product designed to help improve the performance of your sound system is Stinger’s RoadKill Fast Rings. These rings mount around the face of your door or rear parcel shelf speakers and seal up against the trim panel. The concept is that they help to channel all the sound from your speaker into the interior of the vehicle, rather than allowing it to bounce around inside the door. The rings also help reduce panel vibrations for better sound performance.
Sound Deadening Can Make Your Vehicle More Comfortable
 If you watch TV shows like “Detroit Muscle,” “Truck Tech” or “Overhaulin’,” you’ve undoubtedly seen the guys apply a thorough layer of sound deadening material to the floor of some of the coolest hot rods ever. Not only do these materials help keep your vehicle quiet, but they also help block heat from the road, engine, transmission and exhaust from heating up the interior of your vehicle. Dynaliner from Dynamic Control of North America, D-Mat from Design Engineering and the aptly named Heat Barrier from Thermo-Tec are specifically designed to prevent heat transfer into the interior of your vehicle.
What to Look For When Buying Sound Deadener
Most shops latch onto a particular brand of sound deadening material that they find effective and reliable. In most cases, you can trust their choice. If you want to get picky, the most important aspect of choosing a high-quality damping material is to select one that will stay adhered to your vehicle.
 There are two common problems that occur with damping materials. First, they simply may not have a strong adhesive or they require extensive surface preparation to stay adhered to a panel. Some damping materials will stick to slightly dusty surfaces without any problems. The second and more important concern is that the material itself is thermally stable. You don’t want the deadening to peel off when it gets hot in the summer. We’ve heard of many cases where vehicle carpets and headliners have needed to be replaced because damping materials turned to a liquid and contaminated them.
Install Comfort in Your Vehicle Today
If you want your car doors to close with a thud instead of sounding tinny, if you want to reduce the road and exhaust noise in your car or you want to improve the performance of your hands-free phone system, drop by your local mobile electronics specialist retailer and ask about having sound deadening installed in your vehicle. We know that you will be thoroughly impressed with the improvement.
This article is written and produced by the team at www.BestCarAudio.com. Reproduction or use of any kind is prohibited without the express written permission of 1sixty8 media.
 People choose to have their car, truck and SUV
  The sun produces a great deal of energy. This energy includes radio waves, microwaves, infrared energy, visible light, ultraviolet rays, X-rays and gamma rays. UV radiation is broken down into three subcategories: UVA, UVB and UVC. UVC radiation has wavelengths between 100 and 280 nanometers and is blocked almost completely by the ozone, water vapor, carbon dioxide and oxygen in our atmosphere. UVB energy ranges from 280 to 315 nanometers. The atmosphere blocks roughly 90 percent of UVB energy. UVA ranges from 315 to 400 nanometers and, because of the high levels that reach the surface of the planet, is responsible for the majority of the skin damage we experience.
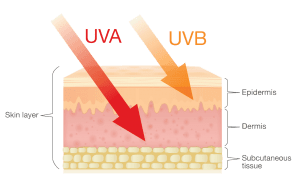 Our skin naturally produces a dark pigment called melanin when exposed to UV radiation. Melanin serves as a shield against UV damage. If the UV exposure is prolonged, the layer of cells in the upper skin layer is killed. The result is that your skin turns red in a process called erythema. Contrary to the term “healthy tan,” there is no such thing.
 Automotive window films from companies like 3M, Llumar and Scorpion block between 95 percent and 99 percent of ultraviolet radiation. This protection is the equivalent of wearing a lotion sunscreen with an SPF rating of 1000. You get the same exposure to UV energy after 1,000 minutes as you would in 1 minute without the tint. That’s impressive.
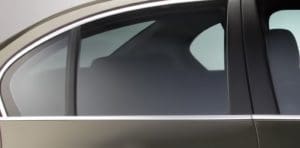 The answer to the question “Does darker tint protect better?” is both yes and no. Within a specific series of window films, you may find that their lightest shade of tint (say, a 50 percent tint) blocks 95 percent of UV energy where the darkest films (around 5 percent) blocks 99 percent. Both are quite excellent and offer exceptional protection.
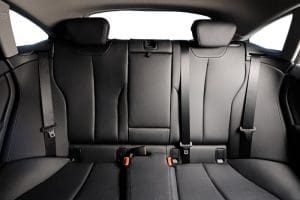 UVA and UVB energy are also responsible for causing the color of textiles and leather to fade. The process of breaking down the chemical bonds in the dyes used in these materials is called photodegradation. Dyed textiles are particularly susceptible to fading. Having your windows tinted with a quality film will help maintain the appearance and value of your vehicle for many years.
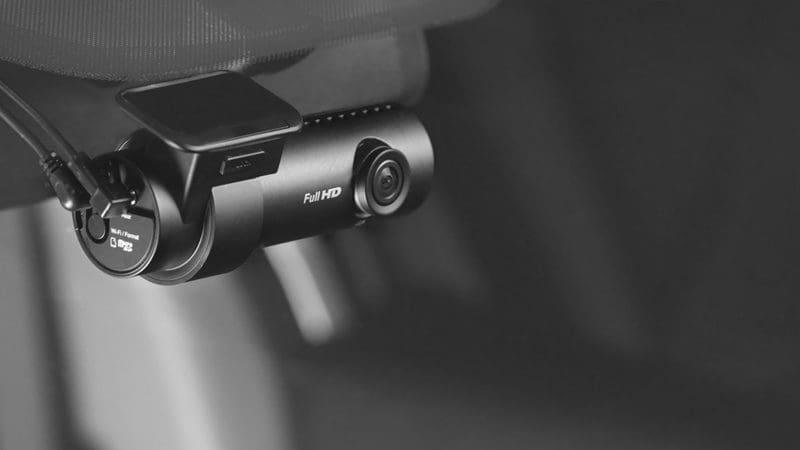 Have you ever been driving along and witnessed something that you wish you could have captured on video? It could be a car accident, strange or reckless driving behavior or just something interesting you want to share on social media. We most certainly can’t drive around with our smartphones in our hand, and when something worth recording does happen, we’ve usually missed the opportunity to capture the moment. A dashcam system is the solution. Read on to learn everything you ever wanted to know about
 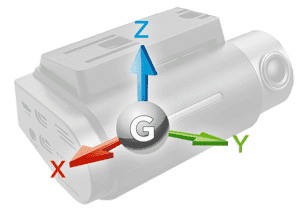 Dash camera systems are typically wired into the ignition circuit of your vehicle and begin recording as soon as you start your car or truck. There is no need to remember to press a button. Most camera systems include an integrated accelerometer that records forces in all three axes along with the video. This information can be used to show acceleration and braking and cornering forces, as well as to detect impacts in the event of an accident.
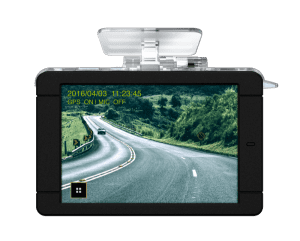 As mentioned, most cameras start recording as soon as the vehicle ignition is turned on. Options in the setup menu allow the installer to configure the length, frame rate and the resolution of the video. Typical video lengths are one, three and five minutes. These short lengths make it easy to pick out certain events while ignoring long periods of uneventful driving.
 There are two basic styles of
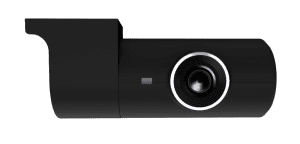
 Another popular camera option is called Parking Mode. When activated, the camera will operate even after the ignition is turned off. Parking Mode works in different ways for different cameras. Some record at a much lower framerate. Some monitor the image for changes (when a person approaches the vehicle, for example) and only start recording when a change is detected. Parking Mode is a great feature for people worried about someone breaking into or vandalizing their vehicle.
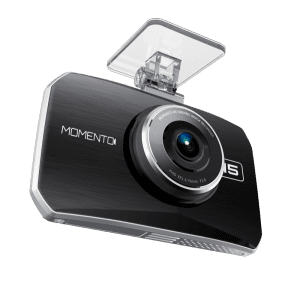 Beyond features, buying a dashcam is similar to buying any other video or still picture camera. The amount of information stored depends on the resolution of the camera system, the quality of the image sensor and the optics (lens quality) of the system. If you want a yes or no answer to who caused an accident, any recording system will work. If you are hoping to read a license plate or phone number from the side of a vehicle, you can never have too much resolution. It’s up to you to decide how much is right for your application.
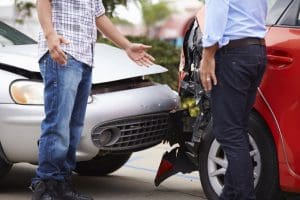 Finally, we should discuss just why it is a great idea to have a dash camera installed in your vehicle. There’s no doubt that a good public shaming on Facebook for someone who cut you off is great entertainment, but the need to protect yourself against fraud and false accusations is very real. You may have seen a news report of video of someone jumping on the hood of a vehicle stopped at red light and claiming the driver hit them. Believe it or not, this does happen. Another popular scam is for a driver to back their vehicle into a stopped car or truck while at a red light. The driver of the offending vehicle will claim that you drove into them. One of the latest scams involves drivers being flagged down by a person on the side of the road. The person will claim they are out of gas and offer supposedly expensive jewelry as collateral in exchange for some money to get gas. If you decide to stop, be sure to let the person know you have a dashcam recording everything, including their license plate.
 Did you know that teenage drivers are three times more likely to be involved in a motor vehicle accident than those who are 20 or older? With their relative lack of experience and the constant bombardment of distractions, it’s no wonder that young people are at risk. The aftermarket mobile electronics industry offers a wide variety of systems and solutions that can protect teenage drivers.
 While it’s certainly best practice to focus exclusively on the task of driving when behind the wheel, now and then, we need to take an important phone call. Bluetooth hands-free communication became a life-saver in the late 2000s, allowing a driver to talk with someone without having to hold the phone.
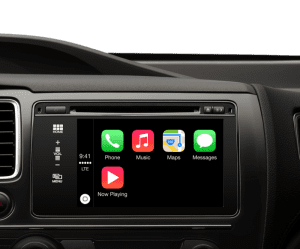 For the ultimate in smartphone integration, an aftermarket multimedia receiver with Apple CarPlay or Android Auto adds a wide variety of communication, information and entertainment options that can be accessed using voice commands. By simply pressing and holding a button on your steering wheel, you can ask these systems to place a phone call, send a text message, or search for an address and provide navigation instructions. The voice recognition technology built into a smartphone allows the driver to keep their eyes on the road and mirrors to ensure he or she is safe.
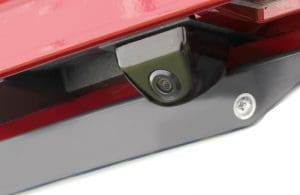 A backup camera system uses a compact camera to let you see an image of anything behind the vehicle. The image from the camera can be displayed on many factory-installed infotainment systems, a new rearview mirror with a built-in screen or an aftermarket multimedia receiver. The image appears automatically as soon as you put the transmission into reverse, so you don’t have to remember to press any buttons. Many video systems will support a secondary camera that faces forward on the vehicle. These second cameras are a great option for trucks, vans and SUVs whose large dimensions make them difficult to park.
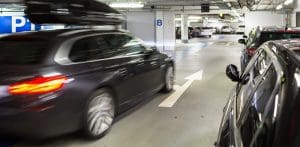
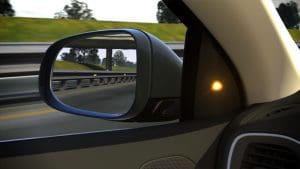 One of the biggest challenges for a new driver is traveling on the freeway. Keeping track of the position of cars and trucks around one’s vehicle can be very difficult. An aftermarket blind-spot monitoring system lets you know when someone is driving beside you and can dramatically reduce the chance of changing lanes when someone is in your way.
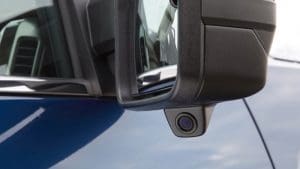 The second option for blind-spot monitoring is a camera system. In these systems, cameras mounted underneath your rear vision mirrors display an image of the area beside your vehicle when you activate the turn signal. Just like the backup camera systems, there are many options available to display the image from the cameras.
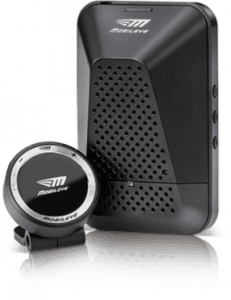 If you are looking for the absolute state-of-the-art in protection, look into the Mobileye series of products. The Mobileye 660 uses a precisely calibrated camera to monitor the area in front of the vehicle and alert the driver when you are leaving your lane, approaching another vehicle too quickly, or at risk of colliding with a vehicle or pedestrian approaching from the side. This is the same technology that Tesla uses in its AutoPilot system.
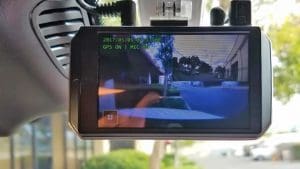 Another great option for a younger driver is to install a dash cam. A
  The last option to consider is a
 In a nutshell, a DSP uses a microcontroller that is designed specifically to manipulate audio signals in the digital domain. Pretty much all of the DSP devices on the market include crossovers, equalizers and signal delay features that we can use to optimize the performance of your sound system.
 At the simplest level, a DSP can be considered a glorified yet extremely precise tone control. When you combine the features of a processor with measurements from a real-time analyzer, a properly trained technician can dramatically improve the tonal balance and accuracy of your audio system. Vocals and instruments will sound more as though you are in the presence of a live performance as opposed to listening to a recording. Expert technicians can use stereo equalization to improve the staging and imaging characteristics of your sound system, helping to increase the realism of the listening experience further.
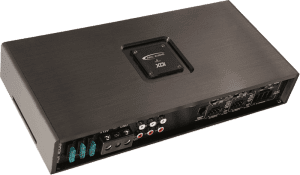
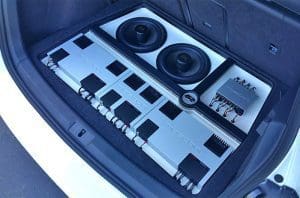
 Let’s continue with our three-way system example. In many systems, the tweeters are mounted at the top of the door, in the sail panel, in the dash or on the A-pillar. Midrange drivers in a system like that are typically 6.5 inches in diameter and are installed in the factory door location. Finally, woofers typically require an enclosure and are mounted in the trunk, cargo area or under the rear seat of a pickup truck. The distance between the listener and each speaker is different, as is the difference between the left and right speakers. These pathlength differences result in us hearing the closest speaker first, which makes our minds think that that is the source of the majority of what we are hearing.
 Well, yes and no. Good quality processors start around $400 plus installation and require at least an hour to configure in most vehicles. If you have a complex multi-channel system, you may need a DSP with more input and output channels and additional time to configure the system in your vehicle.