When it comes to keeping a new or freshly painted car or truck looking like new, paint protection film is a great investment. Also known as clear bra, paint film or helicopter tape, this transparent coating acts as a sacrificial yet durable layer that will help prevent damage to the paint surface by absorbing energy from impacts. Let’s take a look at the history of these films, where they can be applied and why they are a great upgrade.
The History of Paint Protection Film
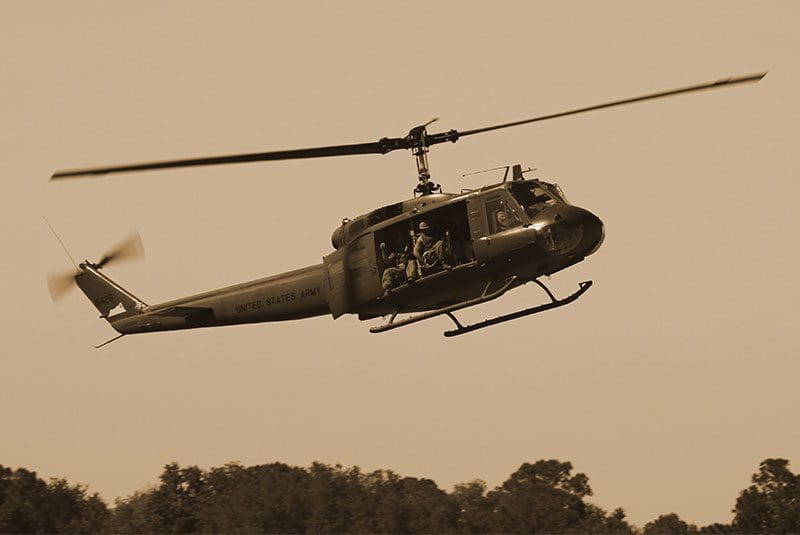 During the Vietnam War, the US military was experiencing accelerated wear on the rotors of its helicopters. Officials contacted 3M and asked for help in providing a solution that would protect these surfaces from damage. The chemists at 3M developed a thermoplastic urethane with an adhesive backing that could be applied over these surfaces to absorb impacts rather than allowing sand to blast the paint off of the leading edge of the rotor blades.
Protect Your Paint with Automotive Clear Bra
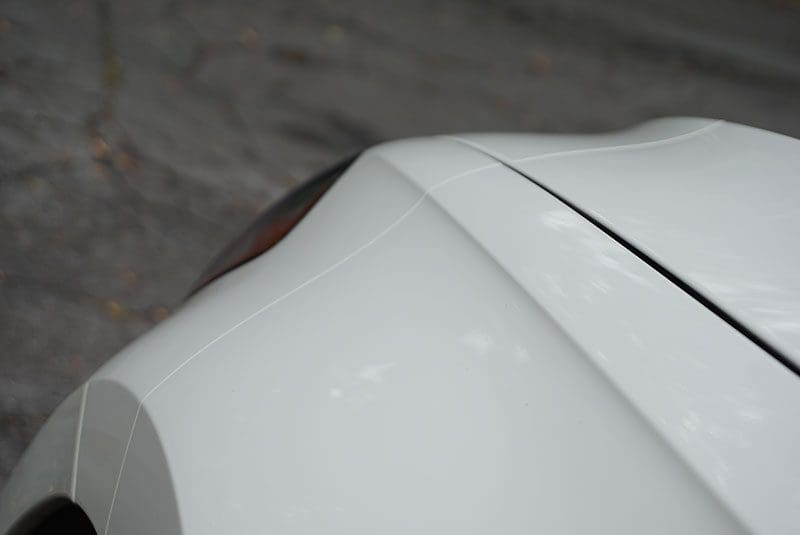
Through the ’90s and 2000s, the popularity of clear bra installations grew at a steady rate. Car dealerships that leased vehicles would often have this film applied to the leading edge of the hood to prevent chips and scuffs from sand, gravel, small rocks and road salt in Northern states and Canada. Unfortunately, many older films use adhesives that would dry out and turn yellow after a few years. These issues have been resolved with the latest products on the market, and modern films carry warranties of 10 years against yellowing, bubbling or cracking. Most paint films also resist chemicals. Road tar, bug splatter and graffiti are kept away from your paint and can be washed away easily with soap and water or a gentle alcohol wipe.
Applications for Paint Protection Film
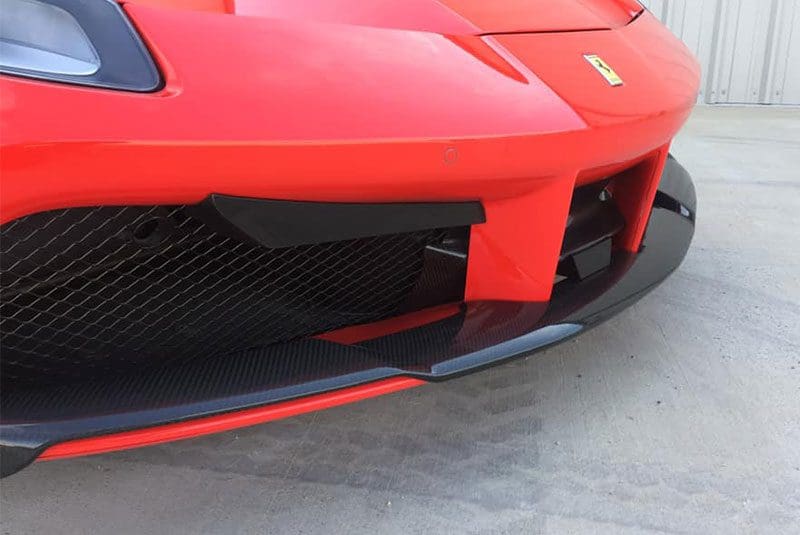
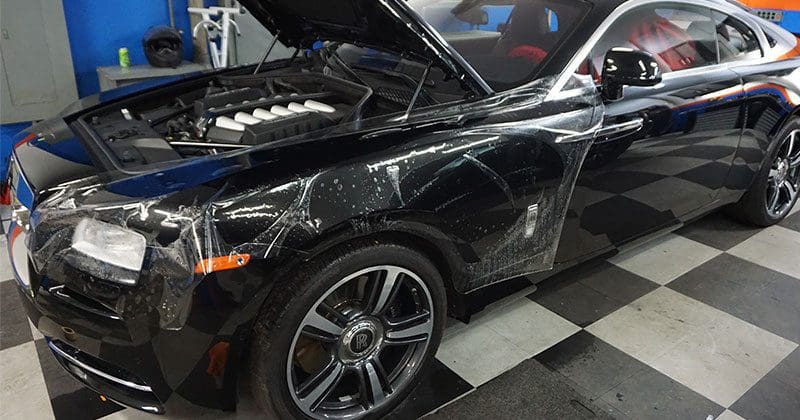
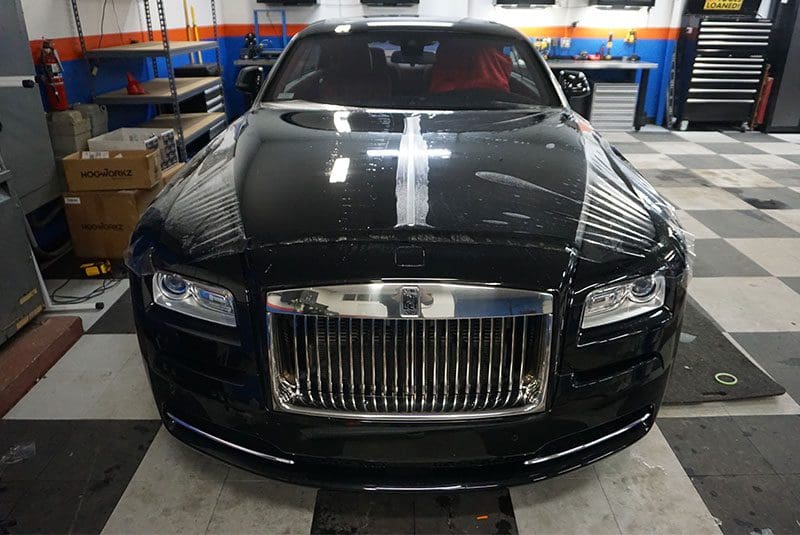
 Most of us associate paint film with installations on the leading edge of a vehicle hood. Thanks to computer-controlled plotters capable of cutting complex shapes in a short amount of time, the film can also be applied to the front bumper cover, headlights, fenders, door handle cups, A pillars, side-view mirror covers and door sills. In fact, some people have their entire vehicle wrapped in film to help ensure it continues to look like new for years and years.
Other popular applications for paint film include the gas tanks on motorcycles, on the rear chainstays and under the down tube of a bicycle, on the gunnels of a boat or anywhere that needs protection from scuffs and scratches.
Self-Healing Properties of Paint Films
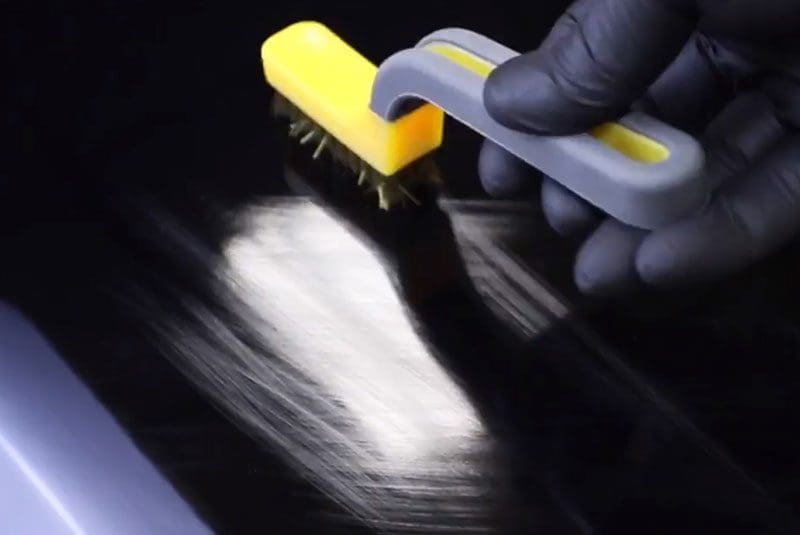
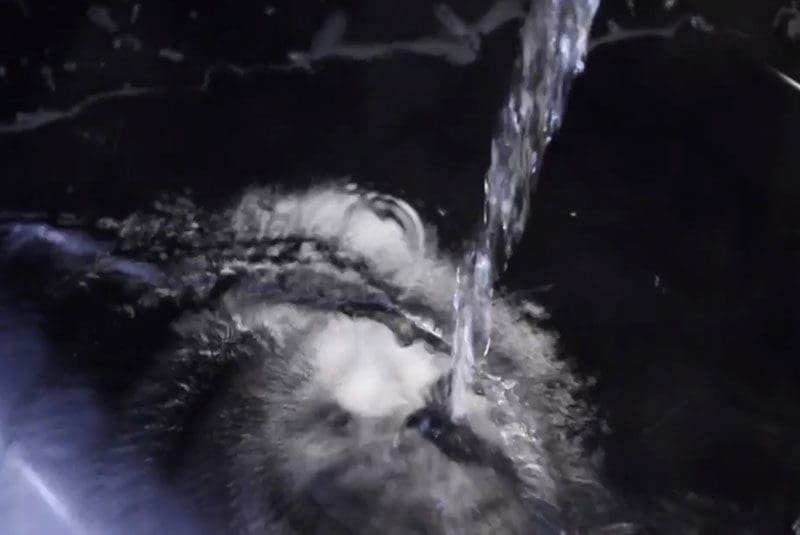
Amazingly, many modern paint films not only prevent small scratches and scuffs from reaching the paint surface, but the film will also heal itself after exposure to heat. There are several video examples of people taking steel wool or a fine metal brush to scratch the surface of the film. Using a heat gun or hot water, the film absorbs the scratches and levels out to restore a smooth, shiny surface.
Expert Installation Is Important
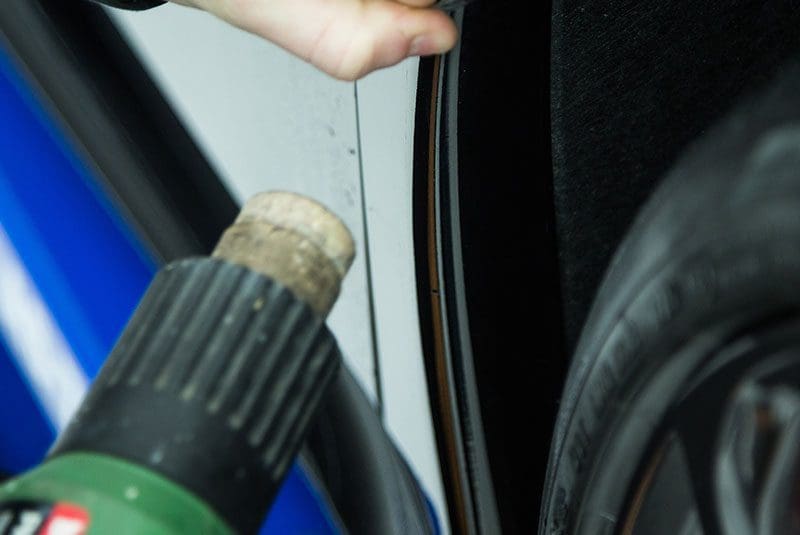
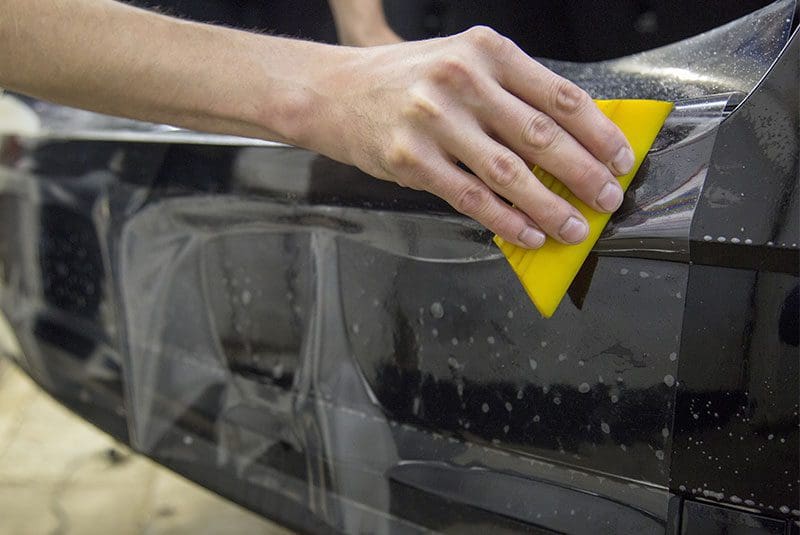 As with any aftermarket automotive solution, the product you choose is as important as the company you choose to perform the installation. Installing paint protection film takes training and experience. Most shops use the aforementioned computer plotter along with software templates of most vehicles on the road. Having the film pre-cut means that the installer doesn’t need to bring a knife anywhere near your paint to trim the edges of bulk film.
Proper surface preparation is also crucial. The paint needs to be flawlessly clean and properly decontaminated to ensure that the film lays flat on the paint without any air bubbles or debris. Be sure to research the specialist mobile enhancement facility you intend to use to ensure they are
properly trained to install the film and are certified by the film supplier so that the warranty that comes with the film will be valid.
Invest in Protection with Automotive Paint Film
If you have a new car or truck, now is the time to have your local specialist mobile enhancement retailer apply paint film to the vehicle. An investment now will keep the paint looking like new for years and years!
This article is written and produced by the team at www.BestCarAudio.com. Reproduction or use of any kind is prohibited without the express written permission of 1sixty8 media.